Showing posts with label nokia. Show all posts

Wednesday, 24 April 2013

QWERTY-packing Nokia Asha 210 goes official


Today Nokia unveiled the latest addition to its Asha lineup. The QWERTY-packing Nokia Asha 210 featurephone comes in both single SIM and dual-SIM flavors and brings entry level functionality at an extremely attractive price point.
Combining a 2.4" LCD screen of QVGA resolution (320 x 240 pixels) with a four-row full QWERTY keyboard, the Nokia Asha 210 is targeted at younger users that do lots of texting and have a limited budget.
Nokia Asha 210 is the first handset to feature a dedicated WhatsApp button, which gives you quick access to the instant messing app that comes preinstalled.
The Asha 210 comes with Wi-Fi connectivity and a dedicated Wi-Fi on/off hardware toggle. Sadly the feature phone lacks any fast cellular network support like 3G or LTE, settling for dual-band GPRS/EDGE. Local connectivity is covered by microUSB and Bluetooth.
The Nokia Asha 210 offers a 2 megapixel camera at the back, but there's no front-facing snapper. The handset has a 3.5mm audio jack and while its internal memory is limited to just 64MB, there's a microSD card slot for expanding it by up to 32GB.
The dual-SIM version will also come with support for Easy Swap, meaning you can exchange the secondary SIM without powering off the handset.
The Nokia Asha 210 is going to be available in yellow, cyan, black, magenta, and white when it goes on sale (sometime in this quarter). The estimated retail price for the Nokia Asha 210 is around $72.

Sunday, 14 April 2013

Airtel 3g 14 April 2013 High Speed Free Internet Trick (Tested and full working)


 Now Follow These Stets >>>

1) Activate Airtel Live! ( It's FREE so no problems)

2) Create 1 Airtel gprs data accounts and select the

FIRST as the active profile.
CODE

Under DATA COMM
~~~~~~~~~~~~
GATEWAY : 100.1.200.99

APN : airtelfun.com
USERNAME : blank

PASSWORD : blank

PASS REQ : OFF

ALLOW CALLS : AUTOMATIC

IPADDRESS :100.1.200.99

DNSADDRESS 1 : 202.56.230.5

DNSADDRESS 2 : 202.56.240.5

DATA COMP : OFF

HEADER COMP : OFF

Under INTERNET PROFILES
~~~~~~~~~~~~~~~~
INTERNET MODE : HTTP or WAP (both works)

USE PROXY : YES

IP ADDRESS : 100.1.200.99

PORT : 8080

USERNAME : Blank

PASSWORD : Blank

3) Connect your mobile to the PC (or Laptop) and install the driver for
your mobile's modem.

4) Create a new dial-up connection using the NEW CONNECTION WIZARD as follows Connecting Device : Your mobile's modem

ISP Name : Airtel (or anything you like)

Phone Number : *99***1#

Username and Password : blank

5) Configure your browser and download manager to use the proxy
100.1.200.99 and port 8080.( My advice is to use Opera since you
can browse both wap and regular websites)

6) Connect to the dial-up account. You will be connected at 115.2
kbps (NOTE* 115.2 KBPS IS A SPEED BETWEEN UR PC AND PHONE ).

7) Pick up your mobile and try to access any site. You will get "Access
Denied."(except for Airtel Live!). IT DOES NOT MATTER.
Keep the mobile down.

8 ) On the PC ( or Laptop) open your browser, enter any address ,
press ENTER and.WAIT

9) After a few seconds the page will start to load and you have the
WHOLE internet at your disposal.

Quote: pls Note If u are getting any error wile dialing a dial up connection than go to
Control panel>> Phone and modem>>>select modem and click on its properties >>advanced
cntd
and enter the following initialization commands
CODEAT+CGDCONT=1, "IP","airtelfun.com","",0,0
and click on ok now connect to gprs it will be connected without any error
to improve the speed
go to run and type
ping -t 100.1.200.99
and pres enter
and minimize the window it will improve the speed delete...........

based on my experience u will get some of teh errors liek this
CODE
"Error 734: The PPP link control protocol was terminated"

possible solution
SYMPTOMS:-
If you try to establish a Point-to-Point Protocol (PPP) dial-up connection, you may receive the following error message:
Error 734: The PPP link control protocol was terminated.
As a result, you cannot establish a dial-up connection.

SE:-
This issue may occur if either of the following conditions are true: • Multi-link negotiation is turned on for the single-link connection.
-or-
• The dial-up connection security configuration is incorrectly configured to use the Require secured password setting.

RESOLUTION:-
To resolve this issue: 1. Click Start, point to Settings, and then click Network and Dial-up Connections.
NOTE: For Windows Server 2003, click Start, point to Control Panel, and then point to Network Connections.
2. Right-click the appropriate dial-up networking connection, and then click Properties.
3. Click the Networking tab, and then click Settings.
4. Click to clear the Negotiate multi-link for single link connections check box (if it is selected).
5. Click OK, and then click OK.
6. Double-click the connection, and then click Dial. • If this procedure resolves the issue and you can establish a dial-up connection, you do not have to follow the remaining steps in this article.
• If this does not resolve the issue and you cannot establish a dial-up connection, go to step 7 to continue to troubleshoot this issue.
7. Right-click the connection, and then click Properties.
8. Click the Security tab.
9. Under Security options, click Allow unsecured password in the Validate my identity as follows box, and then click OK.
10. Double-click the connection, and then click Dial to verify that you can establish a dial-up connection.

Saturday, 6 April 2013

Idea 3g Udp Hack 6 April 2013 1000% Working With High Speed


Features of Idea UDP Trick :

Based on the IDEA Fresh Home Page for new or old SIMS
UDP Port tunneling
High Speed Data Transfer
Both the Protocols are supported
IMAP Messaging allowed
No disconnection
Using free VPN will show the adds
Torrent and other client supported via ZBIGZ.
IDM resumes downloads
YouTube and buffering websites supported.

How to Configure IDEA VPN Config

At first you Must download the NMD VPN and the config files.
OK After downloading this config and NMD VPN just Install the VPN.
Now replace the downloaded config file in the NMD VPN : Program Files folder.
Run the NMD VPN
Windows 7 and 8 Users : Make sure you have run the Program as the Administrator.
Just connect the with any of the two servers, if you are experiencing the disconnection problem then try the third config.
The connection will be established instantaneously.

Screenshots:

Click To Zoom


Password= mrpatialaz

Friday, 5 April 2013

Nokia Starts Selling Cheapest Lumia Phone in India


Nokia is set to launch its cheapest Windows Phone 8 smartphone in India, the all-new Lumia 520, on April 6, 2013. This phone was unveiled at the Mobile World Congress in February 2013 and announced in the country on March 20. The company has priced this device at Rs 10,499 and began taking pre-orders for the smartphone soon after it was showcased in India.

The all-new Lumia 520 comes with a 4-inch LCD IPS touchscreen and is powered by a 1GHz dual-core processor coupled with 512MB RAM. The phone comes with 8GB built-in memory and can support microSD cards with capacities ranging up to 64GB; Nokia is also offering free SkyDrive storage of 7GB with this phone. The device can access the internet over 2G, 3G and Wi-Fi networks, while data can be shared via Bluetooth 3.0 and microUSB 2.0.

The camera sensor of Lumia 520 is rated at 5MP and can shoot videos at 720p resolution, but has no rear LED flash or a front facing camera. This smartphone has imaging features like Cinemagraph, Panorama, PhotoShoot and PhotoBeamer. It runs on a 1,430mAh battery that offers talk time of up to 14 hours.

While unveiling Lumia 520 in India, Nokia also showcased Lumia 720, which is set to hit the country later this month. The company has not yet announced the price of Lumia 720

Wednesday, 3 April 2013

Airtel New 2013 April UC Web Handler Hack With Download Supported


Hey Guys. Today I Posting a New Latest Hacking Trick Of April 2013 100000000% Working And Tested. Its Only Working On UC Web Handler . 
Unlimited Downoad


Instructions:

First make a new setting with the
 proxy as : 203.186.89.16 and
 put port: 80
 then open your uc handler
 put front query as:
  
d.airtelworld.com?nph-proxy.cgi/20/http/


Tuesday, 2 April 2013

Airtel font query woking 1000% march april 2013


Working Front Query April 2013 is here
First create settings in your mobile

proxy 80.239.243.210 

port 80

apn airtelgprs.com then 

Download a opera mini handlar and open it 

and put f.q. 

103.15.227.45/turbo-boost/http/

Please Like Our Facebook Page

Monday, 1 April 2013

Airtel New Hacked VPN TRICK Working 100% Again April 2013


Airtel Freezone trick was blocked a couple of days ago, but thats not true, it was blocked actually but we have another alternative for you and it is working without any glitches. FreeZone trick does not have any speed capping or SIM Blocking issue. Airtel has previously blocked the Host, so this time the host included is completely different. This Host does not have any disconnecting issue so you can browse it with a new richer Experience.

Features of  Airtel New VPN Trick :

Use the APN : airtelgprs.com
Working in Both 2G and 3G Mode.
USE on the APN mobile
No registration required.
Based on the Airtel Ports/Idea also.
Download Resume and torrent support.
Speed is average
No SIM Blocking
Works at Zero Balance

How to Configure Airtel VPN Config

At first you Must download the NMD VPN and the config files.
OK After downloading this config and NMD VPN just Install the VPN.
Now replace the downloaded config file in the NMD VPN : Program Files folder.
Run the NMD VPN
Windows 7 and 8 Users : Make sure you have run the Program as the Administrator.
Just connect the with any of the two servers, if you are experiencing the disconnection problem then try the third config.
The connection will be established instantaneously.

Screenshots:


Wednesday, 20 March 2013

Pheonix Nokia Mobile Repair Software Full Version

www.infolane.blogspot.com


Phoenix Software - is a utility software for flashing Nokia CDMA, GSM, TDMA, and WCDMA products.  
The main components included in the release:  - 
DK2 Driver Version 07.14.0.25; 
- Nokia Connectivity Cable USB Driver Version 7.1.42.0; 
- Flash Update Package 2011.24.000;
- FLS-x Drivers Version 2.09.28; 
- FUSE Connection Manager v 2011.25. 
Main component versions in the release: 
- DK2 Driver Version 07.14.0.25 
- Nokia Connectivity Cable USB Driver Version 7.1.42.0 
- Flash Update Package 2011.24.000 
- FLS-x Drivers Version 2.09.28 
- FUSE Connection Manager v 2011.25. 
MAIN CHANGES & ERROR CORRECTIONS FROM PREVIOUS VERSION 2011_14_4_45945 New features .
- New version of FUSE connection Manager 
- New version of Flash Update Package 
- New version of Autotuning components 
- New version of Product API 
- New version of Connectivity Cable Driver 
- Installation checks the PC for Microsoft DOT.NET 2 Service Pack 2 and installs it automatically if PC has online connectin to Internet. If DOT.NET version 2 SP 2 or newer is found, installation continues normally. If PC is not connected to internet, and DOT.NET needs to be updated installation will be aborted. In this case DOT.NET must be updated manually before installation of Phoenix can continue Error Corrections & changes.
- Crash which occurred when Phone Information UI was open simulaneously with other menu?s has been corrected 
- The Envira Tool ( The ZIP package generator in Help / Troubleshooting – menu) now has a button to delete existing old log files. This makes it possible to clear old logs before reproducing / logging problems to new log files which are then easier to analyse. 
- “No Connection” – problem, which occurred when a connection without phone connected was selected has been corrected. Connection without phone can now be selected.
Please note: - 
Microsoft DOT.NET version 2 Service Pack 2 is now the minimum requirement. Phoenix installation will check PC for the DOT.NET version and update it automatically when PC has online connection. Without online connection, old DOT.NET versions must be updated manually. 
- New common data package location in use. Please see document SR1315 in KICS Information Center for further information.
- All Nokia Service Software Applications will use following location for product specific data: 
- Windows XP: C:\Documents and Settings\All Users\Application Data\Nokia\Packages 
- Windows 7: C:\Program Data\Nokia\Packages 
- Please see atricles SR1774 and 1786 for more information on the use of Nokia Data Package manager – tool, and article SR1854 for more information on the Nokia Service Application Manager Tool. 
- During installation, Data Packages should be installed in these directories, if they install to any other location by default. target folder for local data packages can be changed in the installation wizard manually 
- This version contains the latest Tucson components. Therefore it is not necessary to use Tucson Add-On Installation Packages 
- Before you start Phoenix or Care Suite installation to Windows 7 the User Account Control (UAC) should be turned off from Windows Control Panel settings. 
- For more information concerning new options in “Firmware Update” – menu and their use, Please see documents SR1313 and SR1659 in KICS Information Center. 
- Tucson operations combined with “flash” – option are now handled in the same way as “refurbishment”, which requires Mass Memory Content File to be available. 


Friday, 7 September 2012

Nokia Secret Codes


CodeDescription
*#06#Display the IMEI (GSM standard)
*#0000#Display the irmware version and date (with variant info on S40 second edition or newer)
*#9990#Says Bluetooth Test Mode on Symbian models; accepts without any messages and Bluetooth behaves abnormally on non-Symbian ones (models with build-in Bluetooth radio, activate first to use)
*#bta0#Display the Bluetooth MAC address (models with build-in Bluetooth radio, activate first to show address)
*#mac0wlan#Display the WLAN MAC address (models with build-in Wi-fi radio)
*#opr0logo#Clear the operator logo (3310 and 3330 only)
*#pca0#Activate the GPRS PCCCH support (early GPRS models)
*#pcd0#Deactivate the GPRS PCCCH support (early GPRS models)
*#res0wallet#Reset the mobile wallet (models with mobile wallet)
*#res0#Soft-format the memory (Symbian models only)
*#rst0#Reset to factory defaults, confirmation required (DCT4 or newer)
*#sim0clock#Display the SIM clock status (DCT3 only)
*#ssn0#Display the manufacturing serial number (mid-range and premium DCT3, basically all DCT4 and BB5 non-Symbian models)
*#war0anty#Display the manufacturing and repair info (no exit on DCT3) or total talk time on Symbian models
Note: many S40 firmware releases since 2009 disable this code
*efr0#Enable EFR encoding (pre-2003 models)
#efr0#Disable EFR encoding (pre-2003 models)
*hra0#Enable HR encoding (pre-2003 models)
#hra0#Disable HR encoding (pre-2003 models)
#pw+1234567890+n#Display the SIM lock status: (pre-2003 models)
n = 1: provider lock
n = 2: network lock
n = 3: country lock
n = 4: SIM lock
n#


*#92702689#            
n = 1..999: recall the number stored in the SIM location n (DCT3, DCT4, BB5 models)


Mobile LIFE TIME

Saturday, 11 August 2012

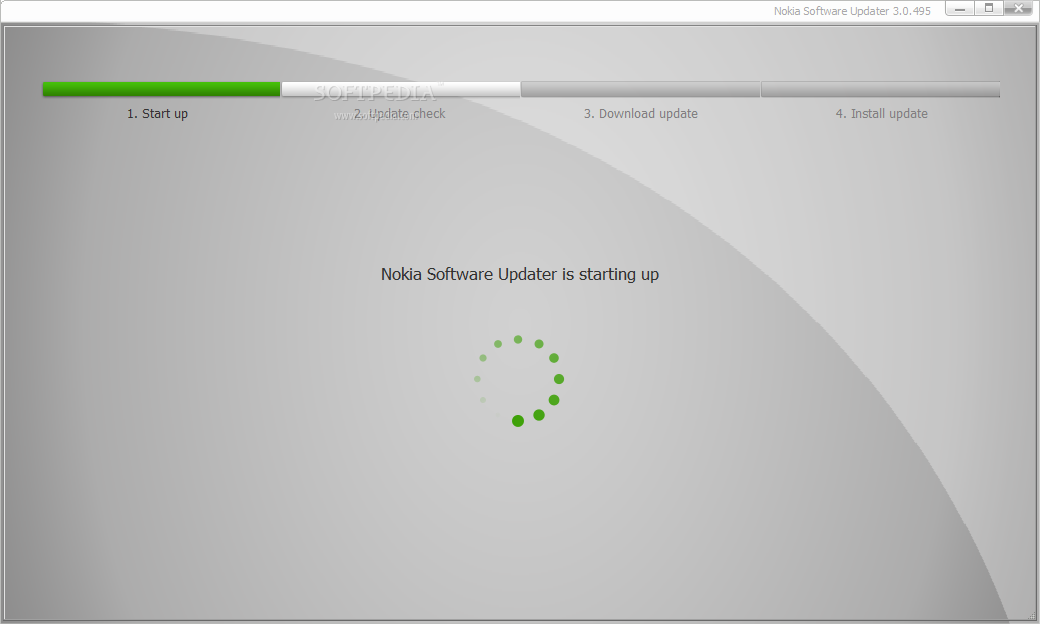
Nokia Software Updater 3.0.655


Nokia Software Updater screenshot 1


Updating the software on your phone is just as important as updating applications on your computer. In some cases, depending on the producer, dedicated tools are rolled out for this purpose alone: to scan your phone’s operating system and update all existing software applications.


That’s also the purpose of Nokia Software Updater, a powerful and user oriented tool that can download and install updates for most Nokia mobile phones out there.

The installation process takes quite a while and requires you to restart your computer in order to be able to run the application. The GUI of the program has a professional, yet simple look that allows you to clearly identify all the features at first look.

In order to launch the software properly, the user is required to connect the Nokia device to the computer through a USB cable, so that the application can automatically identify the phone model and the installed firmware version.

If everything goes according to the plan, Nokia Software Updater checks both the firmware and the software installed on the phone for updates and allows you to start the download process right away.

During our tests, we had one pending software update, so the application automatically retrieved the package and installed it for us. Everything is done quickly and effortlessly, without requiring intervention from the user.

All in all, Nokia Software Update serves its purpose pretty well and manages to download firmware updates while remaining pretty light on computer resources. It is easy-to-use, intuitive and saves you the time and effort of manually searching and downloading updates for your Nokia phone.


 Requirements:

· 1GHz, or higher, Pentium-compatible processor
· At least 256 MB of RAM (memory)
· Administrator rights to install
· High-speed internet connection

download from here 

Nokia pc suite

Nokia PC Suite is an application designed to enable Nokia phone owners to transfer important files from the mobile phone to the computer and vice versa, but also to control some of the handheld's features straight from the desktop.


The tool is supposed to provide some new functions to those who purchased a Nokia phone, including editing, backing up and synchronizing the files. Nokia PC Suite pretty much does that, as it is an easy to use application with a very pleasant and intuitive interface you should become accustomed with in a matter of minutes.

All functions can be accessed from the main interface, as soon as the phone is successfully connected to the computer. There are four connectivity options available: Bluetooth, infrared, serial cable (CA-42) and USB cable, with the last one being the fastest.

At times, some connection problems may occur while trying to pair the mobile phone and the computer. Also file transfer or other functions of the application could become unavailable. If this occurs, your should disconnect the devices and try to establish a new connection.

The messaging function of Nokia PC Suite comes in quite handy since it allows you to write an SMS message on you computer and send it to someone in the address book. However, note that the message is not automatically transferred to the phone's “Sent” menu.

The synchronization and backup features enable you to keep the important content stored on your Nokia phone safe and ready for a quick restore. You can sync notes, contacts and calendar and thus keep them up to date on both computer and mobile device.

Another very useful function you will find in Nokia PC Suite is the video viewing and conversion. You can use it to turn any movie into the video format supported by your Nokia phone.

Bundling a lot of powerful functions that allow you to effortlessly control and manage the content on your mobile phone, Nokia PC Suite offers a pleasant experience overall.                                                 


download from here